The theory of RHEL-ativity
So, you want to install RHEL? Thankfully it's not too tricky a process somewhat nuanced (see below), as we'll discover here. My first step was to login to access.redhat.com and downloaded the RHEL 8.2 Boot ISO.
A note on licencing/suscriptions etc: I have access to employee SKUs for a lot of Red Hat products, so will be using the downstream versions, but in most cases there is an Open Source upstream project to provide the same functionality
Once the ISO was downloaded, it was time to get it onto a USB stick. I (like many of us I suspect) have a load hanging around, so grabbed an 8GB one, and cleared everything off, formatting it to FAT32. The next thing to do is to get the ISO onto the memory key.
If you've newly formatted it, unmount it (I performed all this in the Disk Utility application on my Mac), then it's off for our first foray to the command line.
First things first, lets find out where my newly formatted USB stick is. As I'm a mac user, diskutil list will give me the address of all disks, my output can be seen below, with the USB stick at /dev/disk2.
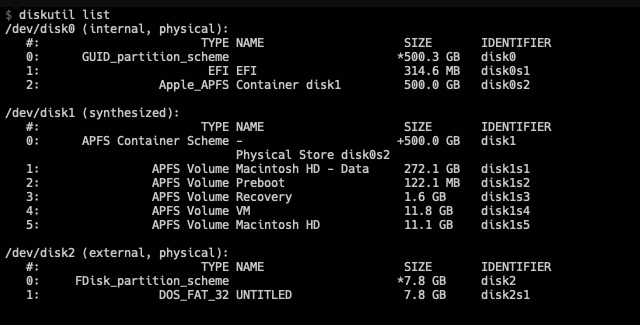
The next stage is to use dd to move the ISO onto the Disk. I changed into the directory containing the RHEL download, and used sudo dd if=rhel-8.2-x86_64-boot.iso of=/dev/disk2 to create the boot media. After a short wait, I got confirmation that everything had moved across just fine.

From there, it's time to take the USB stick, whack it into the server, plug in a keyboard, and power up to see what happens. I followed the official install guide, and after a little bit, had the installer up and running. That is where my problems started. For some reason, the installer was unable to see any of the 4 HDDs the machine has in it. I rebooted, checked to be sure there was actually drives in it, used the onboard RAID to create a volume, yet still there was no disks showing in the installer.
Then the penny dropped.
Being the inexperienced soul that I am, when configuring up the server, there were a number of choices that I made somewhat blindly, and HDD choice was one of them. The configuration offered me both the choice of SAS drives as well as SATA. A quick google informed me that SAS was not some kind of Andy McNabb Special Forces tie in, but Serial Attached SCSI - that sounded suitably geeky to me, so I greedily added four to my basket.
Turns out, this was possibly a bad idea - seems RHEL 8 removed the support for a lot of SAS cards -particularly those common in the sort of repurposed servers homelabs love - the curse of looking for a bargain I guess. I spent a little time reading some articles, ended up looking to side load the SAS drivers, and then realised I wasn't that brave, and downloaded RHEL 7.8.
Followed the same steps above (sneaky dd to get a boot USB), and tried again, this time successfully! I went through the installer, picked sensible defaults - created it as an Infrastructure Server, a Virtualisation Host with System Administration Tools and System Management enabled, sat back and let it do it's thing. 20 or so minutes later (maybe longer, I wasn't timing), and I had success.
Managing the Sucker permalink
The first thing to do on any RHEL machine it seems is the good old Subscription Manager dance
subscription-manager register
subscription-manager list --available --all
subscription-manager attach --pool=<id>
A quick refresh of all repos
subscription-manager repos --disable=*
subscription-manager repos --enable=rhel-7-server-rpms
subscription-manager repos --enable=rhel-7-server-extras-rpms
subscription-manager repos --enable=rhel-7-server-optional-rpms
yum update
Then, on the advice of a friend, I installed Cockpit - a really nice, web based gui for administering servers - it will certainly make life a lot easier when getting started, and looks kinda pretty to, which doesn't hurt - who knew this stuff was available these days!
The setup instructions are quite clear, and after a few more commands, and some unblocking of ports, I was able to login and see some of my wee servers stats.
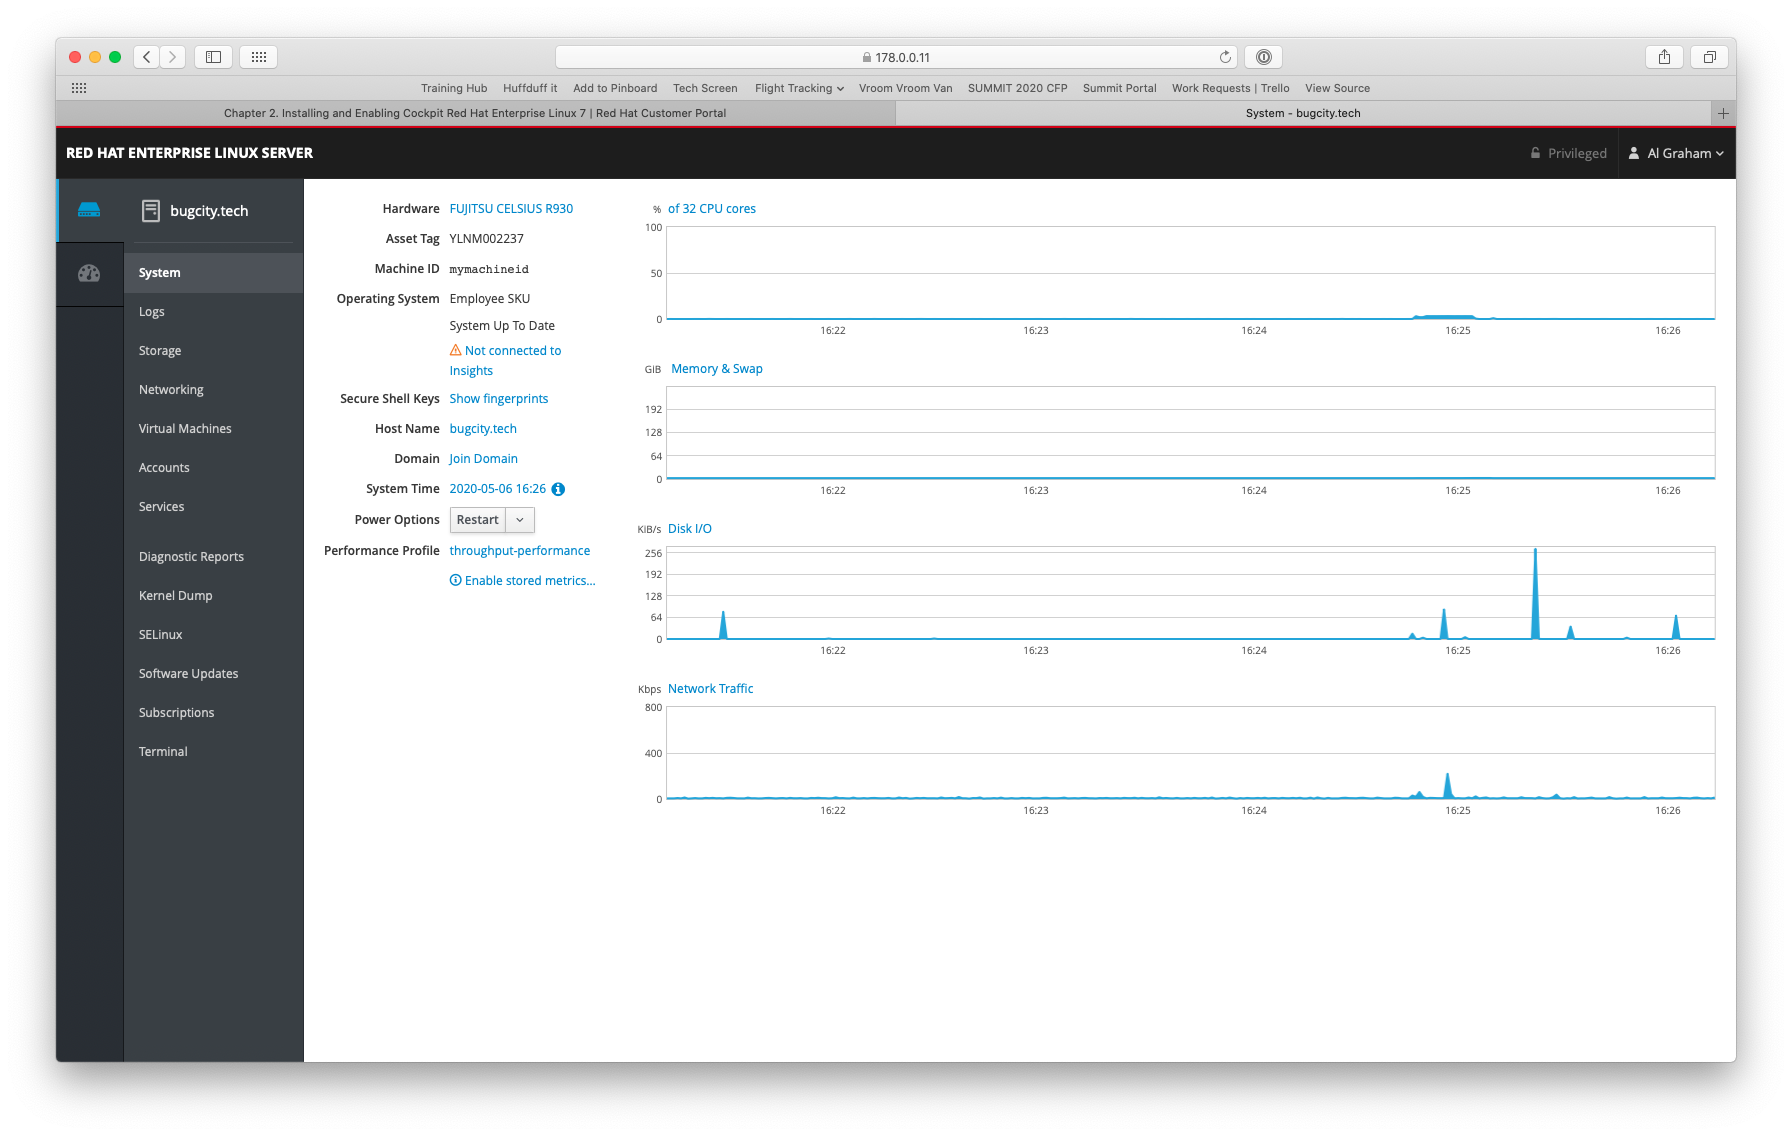
The eagle-eyed, or nosy of you might well see the 'Virtual Machines' tab on the dashboard, but that is what the next post will get into.